Poondu Karuvepilai Kuzhambu is a nutritious and flavoursome dish. I would even go as far as to say that it is one of South Indian cuisine’s best offering.
But before I go about sharing with you all more about the curry, I need to tell you about the hero ingredient – curry leaves. The aromatic herb is flavourful and decorative even when used in tadka. Curry leaves enjoy a constant presence is South Indian homes.
If you live in India, I can’t even begin to tell you how lucky you are to have access to this beautiful herb easily. For those living the expatriate life outside the Indian subcontinent will agree that this is precious commodity with a massive price tag for a tiny punnet. “Why am I even cribbing about it?” Allow me to explain…curry leaves are given away for free when you shop for groceries and/or vegetables in small shops or big supermarkets. Yes, free! The quantity is quite generous too. Here I am paying dearly for a variety of herb that’s available for no cost commercially. Alas!
Coming back to singing praises for curry leaves and the kuzhambu…
The herb, in my opinion, adds a lot of character to a dish’s appearance and flavour. In this recipe too, it’s the humble herb that shines in all its glory!
Of all the kuzhambu varieties, I am completely biased to the poondu karuvepilai kuzhambu. It’s a long-term love affair that grew stronger when I lived in Bangalore. Living in a hostel, I had limited access to a kitchen. It didn’t help that I was homesick and constantly missed my father’s cooking. I would go back to Chennai every other weekend to visit family. Guess what I brought back every single time? Yes, you got that one right! I would haul this delicious liquid gold back to Bangalore to last me a week only to rinse and repeat when I travel again.
It is often made when someone is recovering from a cold. When the taste buds are dead and everything tastes insipid, the kuzhambu would be served to awaken your palate and boy does it feel great or what!
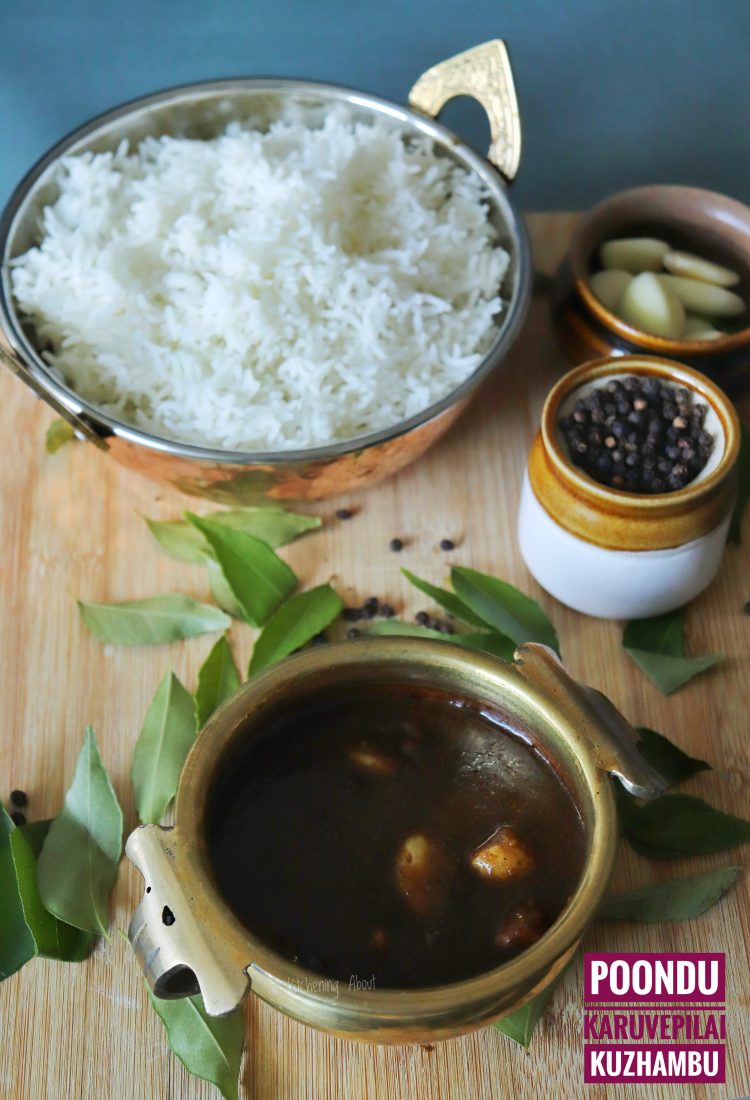
I will always associate this amazing curry with home-cooked comfort and nostalgia. This is also one of my go-to dishes for the colder months. The combination of black pepper, curry leaves and garlic make it a powerhouse of nutrition. Read all about the benefits of curry leaves.
Poondu karuvepilai kuzhambu is one dish that I enjoy in sickness and health. I hope you enjoy reading and trying my version of the classic.
Fun fact: Curry leaves when used whole, is typically discarded. I however enjoy eating it whole when added in curries, chutneys and other dishes. Waste not, right?
Serves: 6 to 10
Ingredients
To roast and grind
- Curry leaves – 1 cup
- Urad dal – 1 Tbsp.
- Whole pepper corns – ½ Tbsp.
- Dried red chillies – 1
- Sesame oil – 1 tsp.
- Asafoetida – 1 pinch
For the kuzahmbu:
- Garlic – 8 to 10 cloves (or more)
- Sesame oil – 1 tsp.
- Tamarind – 1 small lemon sized ball
- Powdered jaggery/ raw sugar – 1 tsp.
- Salt – As required
Directions
Prep:
-
- Soak tamarind in 2 cups of hot water. After about 30 minutes, squeeze out the remaining pulp from the tamarind and discard the fibrous bits.
- Wash curry leaves thoroughly. Let it dry completely.
Method:
- Heat sesame oil in a pan.
- Add the urad dal, turn the flame down and roast gently.
- Once the colour of urad dal starts to change, add the red chilli, pepper corns & asafoetida, and roast them for about 10 seconds on slow flame.
- Toss in the cleaned and dried curry leaves. It will splutter and it is normal.
- Roast all the ingredients until the urad dal is nice and golden, and curry leaves roasted crisp.
- Turn off the stove, transfer the roasted ingredients to a plate and let it cool.
- Once cool, grind into a powder and set aside.
- Heat sesame oil in a sauce pan.
- Add the garlic cloves and sauté them until golden.
- Pour the tamarind extract into the sauce pan and bring to a boil.
- Gradually add the ground powder into the boiling mixture.
- Stir and mix well until the ingredients are combined.
- Add the required salt at this stage and let the kuzhambu simmer.
- Simmer until the kuzhambu thickens and oil separates from the sides.
- Serve with hot rice and ghee/sesame oil.
Tips:
- This will make a generous serving. The good news however is that this kuzhambu will keep well in the fridge for a week.
- The garlic adds that bit of extra flavour. Traditionally, the kuzhambu is made without garlic. Omit the ingredient if you prefer your kuzhambu without garlic.
- Adjust spice levels to suit your need.
- The jaggery is optional. I enjoy the beautiful flavours of spicy, sour and that little bit of sweetness coming together. If you like to retain the punchy spicy and sour flavours, skip the jaggery.
- Adjust ingredients to suit your taste.

Pingback: Puli Kuzhambu Kitchening About
Pairing with hot rice with a dollop or ghee is a mouthwatering experience. I feel like grabbing the whole lot.